Temperature measurement and control equipment is being re-vamped to stand up to challenges of the chemical process industries (CPI)
While the basic premise of temperature measurement instruments hasn't seen drastic changes in recent years, equipment is receiving updates that make it more user friendly and robust in an effort to increase accuracy, reliability and repeatability, which are essential for chemical processors who rely on temperature measurements for product quality and safety.
Temperature measurement & control
Why are temperature measurement and control so important for chemical processors? Jan-Marc Featherston, sales manager with INOR Process AB (Beverly, Mass.; www.inor.com) explains it simply: "Processors need to know and control the temperature, as well as other parameters, of the process in order to make their product precisely and of the same quality every time," he says. "Think of it like making chocolate chip cookies. You don't need to know the exact temperature to make them, but you won't be able to make them consistently, with the same quality or as quickly as you like without knowing the precise temperature at which you're baking them."
More precisely, because temperature plays a critical role in most chemical processes, it can affect everything from product quality to process efficiency to energy usage to safety. When it comes to process efficiency, for example, if the temperature is too low, it may take longer for the reaction to complete, explains Nicholas Meyer, product marketing manager for Yokogawa Corp. of America (Sugar Land, Texas; www.yokogawa.com). "It can also affect product quality," he says. "There may be side reactions and a particular temperature range could favor one of the products over the other, so if you're trying to eliminate byproducts or achieve a particular ratio of product, the temperature would be very important there. Likewise, if you get something too hot, it could burn or degrade the product."
Meyer continues: "Temperature also impacts energy usage. You likely want the process to go as fast as possible, so the initial thought may be to put a lot of energy into it, but eventually you get to a point where that diminishes your returns because the amount of energy you're putting in is costing more than the worth of the quality of product you are getting out."
And, regarding safety, chemical processes may involve volatile reactions or potential runaway reactions so the temperature needs to be monitored closely to ensure that it doesn't get to that point, says Meyer.
In addition, chemical plants and petroleum refineries rely on safety instrumented systems (SIS), which use instruments and controls to keep the process running in a safe manner. "If you're going to rely on instruments to provide that safe mechanism, it's now not just a nice measurement to have, temperature measurement becomes part of an essential system that keeps the process operating safely," explains Tony Maupin, market segment manager with WIKA USA (Lawrenceville, Ga.; www.wika.com).
Accuracy, reliability, repeatability
When seeking temperature measurement instrumentation, processors usually demand accuracy, reliability and repeatability in order to achieve efficient processes that produce high-quality product in a safe and energy-efficient manner.
Accuracy is important when the processor is looking at very critical measurements that affect product quality. "The margin could be very slim between having a successful reaction and burning or degrading a product," says Meyer. "In those cases, accuracy is a very important feature."
Repeatability, or stability, of instrumentation allows processors to know that the same process conditions are being repeated. "Many customers will say accuracy is most important, but that's not always true," says Ehren Kiker, product marketing manager with Endress+Hauser (Greenwood, Ind.; www.us.endress.com). "Accuracy implies that the instrument measures with plus or minus a certain percentage of accuracy, but that means today the measurement could be plus 1% and then tomorrow it could be minus 1%. But, with a repeatable or stable measurement, I know it will always be off by plus 1% and can correct for that. When it's all over the map, even if only by plus or minus 1%, it's not as easy to account for."
And, reliability is also important. "If you have a failed measurement in a batch process, you could waste the batch, cause rework and negatively impact profits," says Yokogawa's Meyer. "Likewise, if the measurement points go out during a continuous process, you could end up with unplanned downtime, which also equals lost profit."
Instrumentation advancements
Often, the user friendliness of not just instrumentation, but of programming techniques and calibration, can impact accuracy, repeatability and reliability of the measurement. For this reason, equipment providers are making it easier to use. To simplify programming and monitoring of temperature transmitters, some manufacturers are adding Bluetooth capability to their instruments.
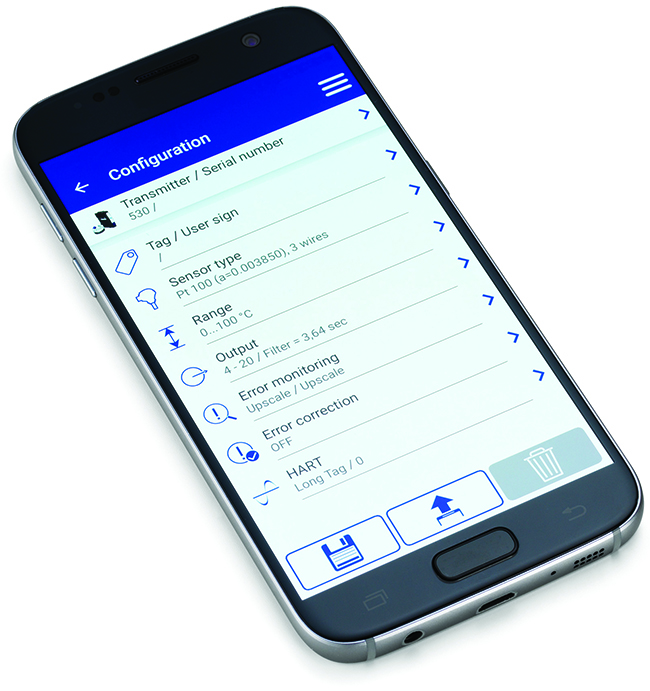
Figure 1. The INOR Connect application allows operators to connect to the transmitter with a smartphone or tablet using Bluetooth or near-field communication so they can configure and monitor temperature transmitters without supply voltage and cables
INOR, for instance, has the INOR Connect application (Figure 1), which allows operators to connect to the transmitter with a smartphone or tablet using Bluetooth or near-field communication so they can configure and monitor temperature transmitters without supply voltage and cables. The application offers the same configuration options as INOR's existing ConSoft transmitter software, but with a more user-friendly interface. "The app gives users the ability to communicate and configure transmitters with their phones, which makes it easier to get the product installed in their process because they can now program the transmitter right in the field. This is a huge help when something goes down at an inopportune time and needs to be replaced and programmed as quickly and easily as possible," says Featherston.
Likewise, Endress+Hauser is releasing transmitters with Bluetooth capability. "The idea is that we wanted to make it easier for users to access the transmitter that's connected to a sensor – whether it's to configure it, get diagnostic information or just see the current measurement value – without having to climb into a unit," says Kiker. The company's SmartBlue App allows users within a radius of up to 20 meters of the device to commission and operate it. For maintenance purposes, all data are at hand in real time and are encoded for secure data transformation. The application helps increase safety because employees no longer have to access hazardous areas, saves time via mobile access to the devices and increases reliability because there is no data loss during commissioning and maintenance.
There are also advances in calibration equipment, which is essential because drifting impacts accuracy and repeatability. "If they aren't getting a reliable measurement all the time, due to degradation of their instruments, that can cause a process shift they aren't aware of," says Scott Crone, North American sales manager with Ametek Sensors, Test & Calibration (San Luis Obispo, Calif.; www.ametekstc.com). "However, a lot of companies rely on just a signal measurement rather than taking the sensor out of the process to save time. But if you're not checking the instrument with an actual temperature source, you won't really know if it's subject to degradation, which can impact quality and efficiency."
Processors often cite efficiency as one of the reasons they don't make proper calibration a priority, says Crone. One way to make it more efficient is to switch from liquid baths to dry block calibration when possible. "There have been a lot of advances in dry block technology and they are available now for a wider range of applications," says Crone. In addition, there are models that approach the homogeneity, accuracy and performance of a wet bath. Also, dry blocks are much faster. "It used to be that the [technicians] had to sit there and watch the calibration during a switch test, but we have automated switch tests incorporated into the dry block. They simply put the sensor in the dry block, put the leads onto the switch and run the test. The operator doesn't need to be there when the test is running," he says. "This means they can be deployed to do other things, which greatly raises efficiency in the plant because some switch tests, when getting to higher temperatures, can take hours to complete."
He adds that many dry blocks now also offer multi-zone control and dynamic load compensation (DLC) technology, which ensures that the well stays stable and the homogeneity is very good.
Ametek STC's RTC Reference Temperature Calibrators, for example, feature wide temperature ranges, DLC technology, which assists with temperature uniformity in the insert, even when calibrating large sensors or many sensors at a time, as well as dual- and triple-zone temperature control, which provide temperature homogeneity in the well.
In the chemical process industries (CPI), the difficult environment can often disrupt sensitive instrumentation, impacting accuracy, repeatability and, especially, reliability, so equipment providers are working on technologies that are more robust in order to function in harsh chemical processes.
"The chemical industry is fraught with environmental challenges and, at the same time, safety and operations excellence are big concerns," says WIKA's Maupin. "So [chemical processors] want reliable products and they don't want to lose the sensor in the process."
For this reason, equipment providers are designing products to be longer lasting, even in harsh environments. For example, notes Maupin, WIKA makes a thermocouple that is finding use in the production of low-density polyethylene (LDPE), which is an extremely high-pressure process. "Thermocouples have to withstand those pressures and still be reliable indicators, because processors use them to control the process and detect whether or not the reactor is in danger of decomposition, which can destroy the reactor and must be detected early," he says. "Any thermocouples in these processes have to respond very quickly to changes in temperature and have to withstand very high pressures."
The answer is WIKA's TC90, which is a high-pressure thermocouple made using special manufacturing processes. The measuring assembly is sealed by means of metal-to-metal sealing, high-pressure threaded connectors or sealing lenses. And, to ensure sufficient joint integrity between the mineral-insulated (MI) cable and fitting, vacuum brazing is used to minimize void spaces and create high-strength joints.
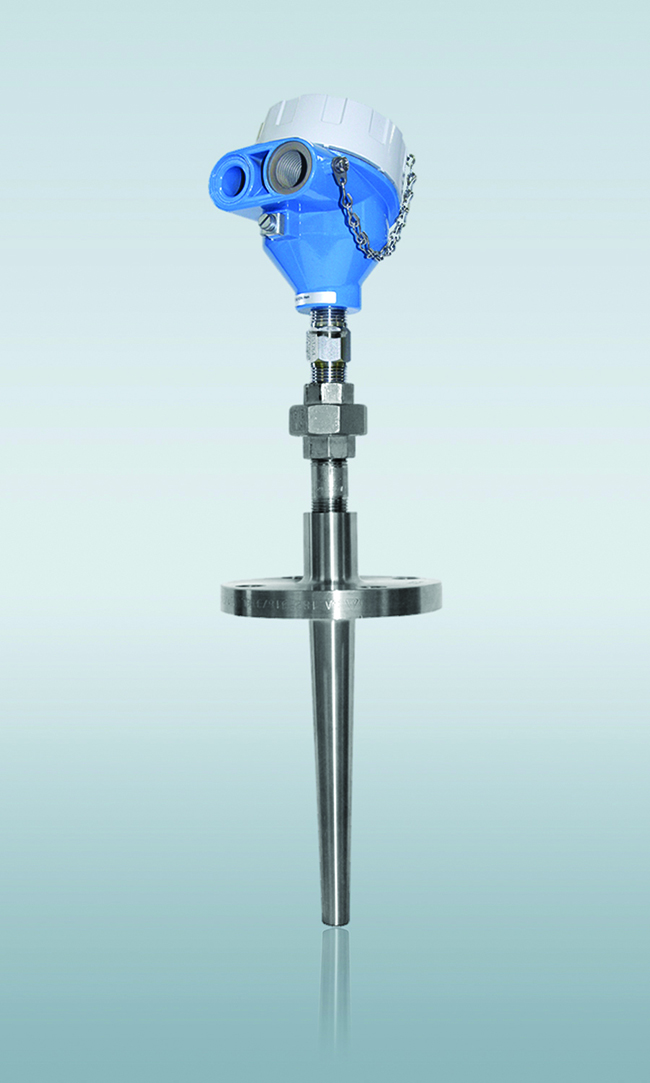
Figure 2. StrongSens can be supplied in temperature assemblies suitable for chemical processes where excessive vibration can lead to sensor failure
And, for chemical and refining processes faced with high vibration, Endress+Hauser developed the iTHERM StrongSens line of sensors (Figure 2). "Pipe vibrations are not good for temperature sensors because the wires inside the sensors are thin, delicate wires, which tend to break when you start shaking them too much," he says. To combat the problem, the company developed an RTD sensor featuring StrongSens technology designed for high-vibration applications. "Typical thermocouples can handle 3G of vibration before wires break. But we've done things with the bonding method used in the sensor tip and supported it with wiring so that it can handle vibration up to 60G," says Kiker. "So, if they do have temperature measurements in an area where they can't get away from pipe vibration, StrongSens gives them something they can use that will be much more robust, resulting in longer product life and less downtime."
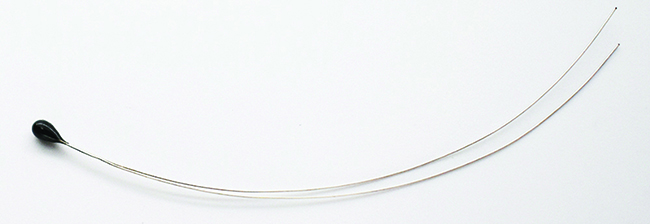
Figure 3. Ametherm's line of ACC NTC thermistors is made using nanopowders to make them more robust in difficult environments
And for thermistors used in lower operating ranges (–40 to 250°C), there have been advances made in the oxide powders used to make the sensors. "Oxides powders were previously only available in micron sizes, but now we are able to get them in nanometers," says Mehdi Samii, vice president of engineering with Ametherm (Carson City, Nev.; www.ametherm.com). "Why is this important? The smaller particle size of the oxide powder makes it easier to produce a chip or disk that almost reaches theoretical density. This results in thermistors that are more rugged, repeatable and extremely durable. They can now withstand very drastic thermal shocks and vibrations without affecting repeatability, accuracy and thermal response. This enhances the product very much." The company's line of ACC NTC thermistors is made with the nanopowders (Figure 3).
Non-intrusive measurements
There are also some applications in which the material is either too corrosive, the environment too harsh or the application too tricky to use traditional measurement techniques effectively or efficiently. For these applications, there are non-intrusive technologies.
"There are times when the process itself is difficult to measure due to caustic or abrasive materials or you may not want to drill into a pipe and create a potential leak point, but traditional surface temperature measurement does not provide an accurate or repeatable representation of the internal process temperature, so we're developing technologies that don't require penetration, but still provide accurate measurement of internal process temperature," says Kevin Stultz, global product manager with Emerson Automation Solutions (Shakopee, Minn.; www.emerson.com).
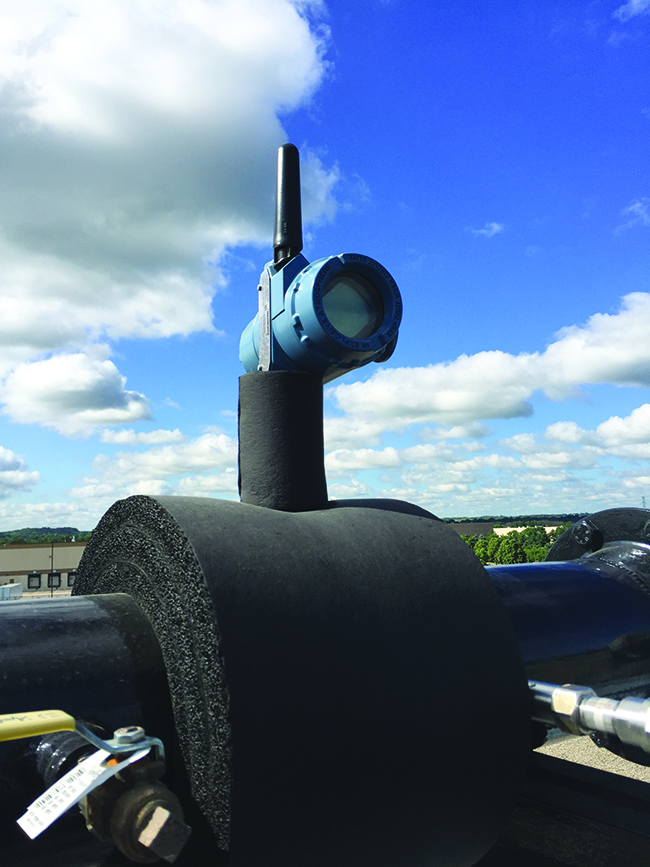
Figure 4. Emerson's Rosemount X-well uses a thermal conductivity algorithm and an understanding of the conductive properties of the temperature measurement assembly and piping to accurately measure internal process temperature
Emerson's Rosemount X-well technology delivers accurate process temperature without thermowells or process penetrations (Figure 4). Using a thermal conductivity algorithm and with an understanding of the conductive properties of the temperature measurement assembly and piping, this non-instrusive temperature sensor solution is able to accurately measure internal process temperature.
For other applications, such as those involving reactors or vessels where hot spots or temperature differentials can indicate that the product is not being mixed well or other issues, it can become cost prohibitive to employ traditional single insertion probes, says Yokogawa's Meyer. "We offer the DTSX series of fiber optic sensing cables to provide continuous temperature sensing for long distances," he says. "The solution provides enhanced visibility into the process because you can completely wrap a reactor or a vessel and program in temperature zones, which allows users to measure temperature all along the string."
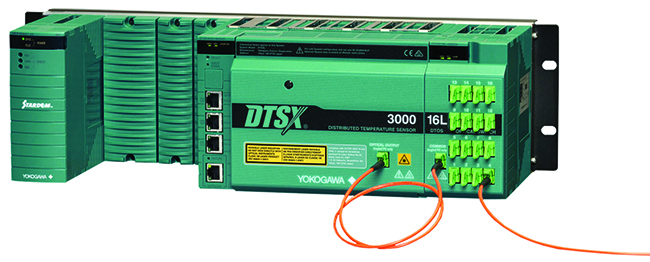
Figure 5. The Yokogawa DTSX3000 measures temperature and distance over the length of an optical fiber using the Raman scatter principle
The Yokogawa DTSX3000, for example, measures temperature and distance over the length of an optical fiber using the Raman scatter principle (Figure 5). A pulse of light launched into an optical fiber is scattered by fiberglass molecules as it propagates down the fiber and exchanges energy with lattice vibrations. As the light pulse scatters down the fiber optic cable, it produces longer wavelength and shorter wavelength signals, of which both signals shifted from the launch of the light source. The intensity ratio of the two signals components depends on the temperature at the position where the Raman scatter is produced.
Temperature is determined by measuring the respective intensities of the longer and shorter wavelength signals. Furthermore, part of the scattered light, known as the backscatter, is guided back towards the light source. The position of the temperature reading can thus be determined by measuring the time taken for the backscatter to return to the source.
No matter what your process, its environment or your temperature measurement needs, there is likely an instrument that can stand up to the challenges to help bring efficiency, quality and repeatability to your process.
